Follow the below step-by-step procedure to create/post a job listing on Jobs Vibhaga.
- To post a job listing on ‘Jobs Vibhaga’, open the website and log in to it.
- Drag the mouse to your username on the menu bar, a submenu is provided showing ‘Post a Job’ submenu item. Just click on it.
- After clicking on ‘Post a Job’, you are immediately redirected to the webpage showing a job listing form as shown in the below screenshot.
Screenshot: Post a Job – Web page.
- As shown above, fill all the details which are required to post a job listing. The individual details of each component in the form and its functionality is as follows.
- Job Title:
Enter the job title/name which you want to provide for that particular job listing. Choose the best job title to attract more candidates as shown in the below examples:
Ex 1: “Hiring certified MBBS Doctors for top Medical Hospitals!”
Ex 2: “Immediate requirement of Project Managers for Software Development Company!”
If you are struggling in writing the best title for job posting, refer the help articles in the blog.
- Location:
Enter the exact job location, i.e. work location which is easy to find on Google maps.
This will help the candidates to know the work location exactly through the search engine’s integrated map tool, and the job listing appears in a front if any candidate/user searches using location filters.
Ex: Trident Hotel, Hyderabad, India.
“This kind of full details help to point the exact locations on the map, even it helps to appear front in the Google search engine when a user searches for nearby jobs.”
- Application Email / URL:
Enter your Email ID here to which you want to receive the application notifications. If you want the candidates to redirect to your own custom webpage when they hit the apply button, then enter the URL.
Email application method is suggested, so enter your email Id to receive the applications directly to your email ID with complete resumes.
- Job Region:
Select the Job Region from the dropdown list provided, this helps when a candidate searches for jobs using the regions provided in the search engine.
- Job Type:
Select the job type from the provided dropdown list. Select whether your job is Freelance, Temporary, Part time, Full time or Permanent. You can select the multiple elements/options if required.
By doing this, candidates can understand the type of the job. It is shown on the Job Listing with its dedicated color as shown in the below screenshot.
Screenshot: Job Listing Web page highlighting Job Type.
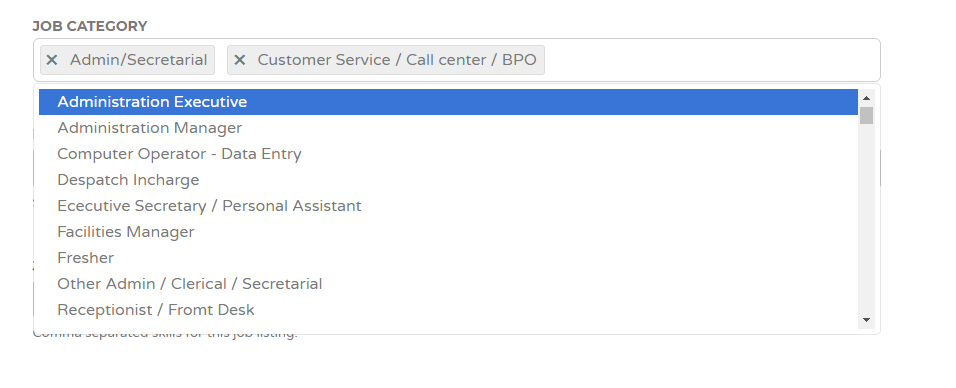
- Job Category:
Select the Job Category from the dropdown list provided. Choose the best category that matches your job posting, it depends on Job Department or Functional Area, Job role or Industry. We can select the multiple categories if required.
Screenshot: Dropdown list of job categories.
- Industry:
Select your organization/company’s industry from the dropdown list provided.
- Job Skills:
Enter the skills required for employees/candidates who apply for your job listing.
Ex: Java Core, CSS, PHP, HTML.
- Featured Image:
To set a featured/ad image which suits your job posting/listing select the image file from your computer by clicking on the provided button ‘Choose Image’.
Suggested image size is 720 X 350 Pixels, not more than 1.MB.
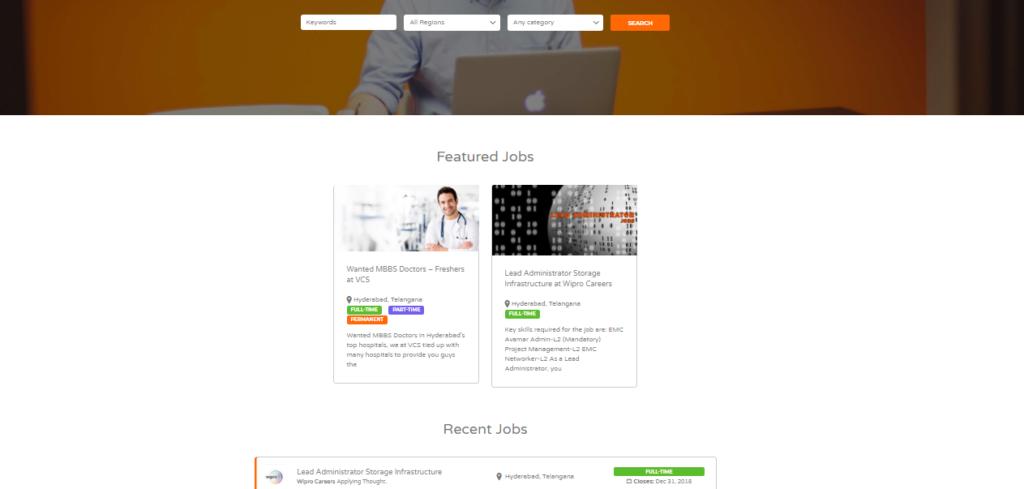
This image is used if it is a premium job listing, i.e. the premium job listing is advertised on Job Vibhaga’s homepage, and other official social media profiles of Jobs Vibhaga.
Screenshot: Featured job listings on Homepage.
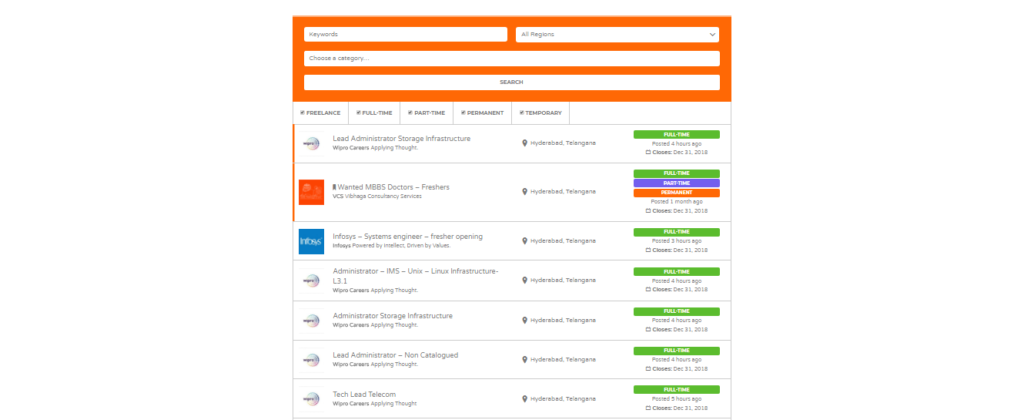
Screenshot: Sticky Jobs on ‘Find a Job’ page.
Screenshot: Featured job on social media profiles.
Screenshots: Sample Google Display Ads.
As you see in the above, the premium job listings are advertised on all kind of possible platforms to get the best results, i.e. to get most applications to that particular job listing.
- Description:
Enter the job description here, that is complete job info which you want to expose it to the candidates, this is helpful for the candidates to know more about your requirement. Suggested to avoid entering the contact details in this field, better to enter the contact details in their respective fields required.
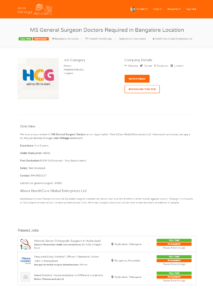
Screenshot: Description area on the Job listing. [Sample/Example listings just for learning/purpose]
- Closing Date:
Enter the application deadline date or closing date if have any. This helps the users if the closing date ends and avoids unnecessary applications or walk-ins.
Company Details (Fields regarding Company details):
- Company Name:
Enter the name/title of your company/firm/organization name.
- Tagline:
Enter the slogan/tagline of your company.
- Description:
Enter the description/information of your company/organization.
- Video:
Provide here the video link if have any regarding your company info.
Ex: Copy and paste the URL of video which was posted on Youtube, Vimeo, or any other video blogging platforms.
Screenshot: Pop-up video window of Job Listing.
- Website:
Enter your company’s website URL if have any.
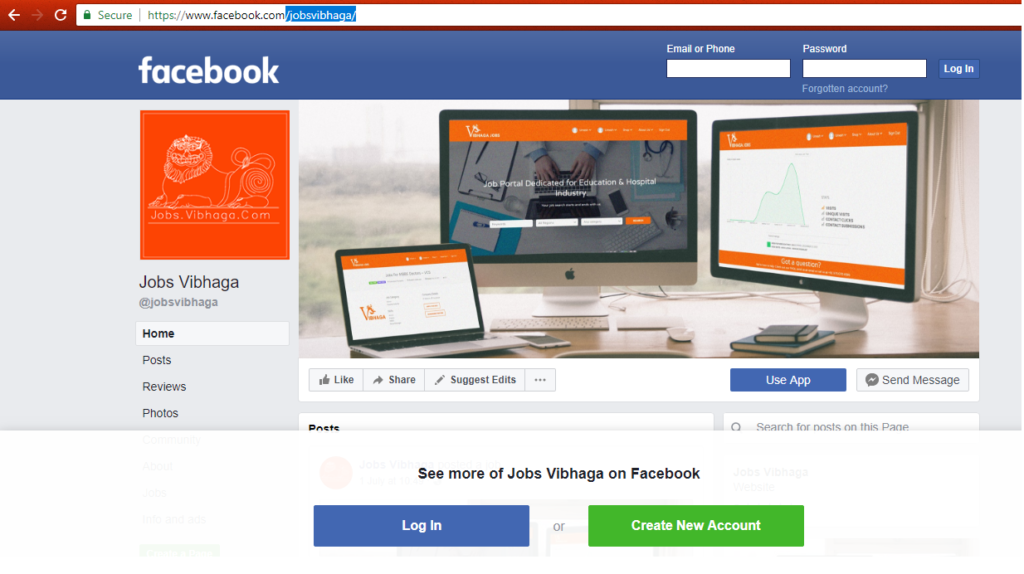
- Facebook Username:
Enter your company’s official Facebook username. If you don’t know how to find the Facebook page’s username, refer the below screenshot.
Screenshot: Facebook username example.
Enter this, if you want to include this social media profile on Job Listing, otherwise left it empty.
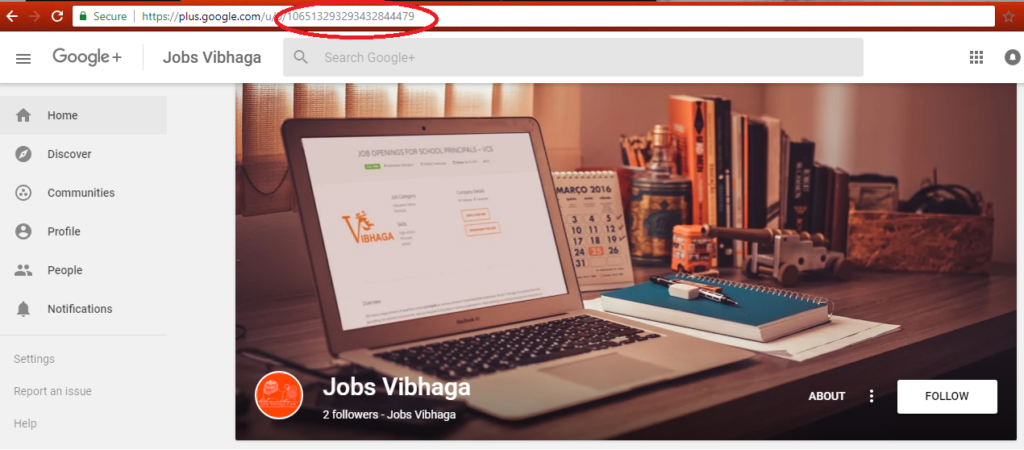
- Google Plus’s Username:
Enter your company’s official Google plus username. If you don’t know how to find the Google Plus page’s username, refer the below screenshot.
Screenshot: Google Plus username example.
Enter this, if you want to include this social media profile on Job Listing, otherwise left it empty.
- LinkedIn Username:
Enter your company’s official LinkedIn username. If you don’t know how to find the LinkedIn page’s username, refer the below screenshot.
Screenshot: LinkedIn username example.
Enter this, if you want to include this social media profile on Job Listing, otherwise left it empty.
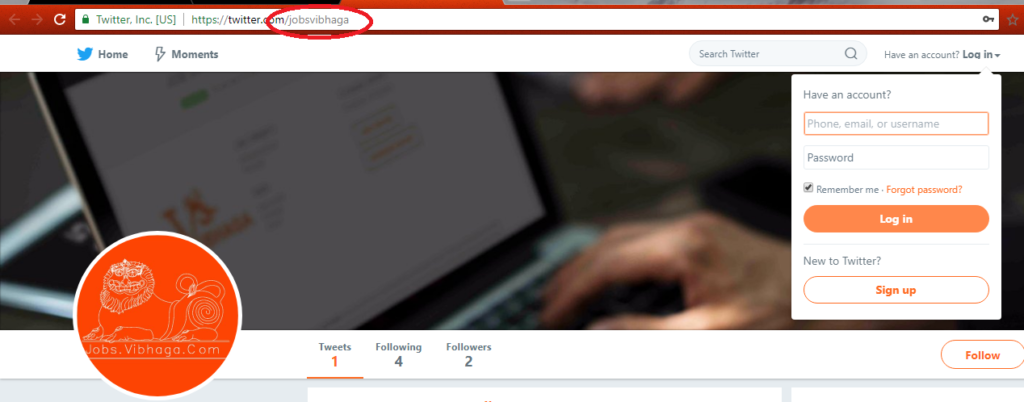
- Twitter Username:
Enter your company’s official Twitter username. If you don’t know how to find the Twitter page’s username, refer the below screenshot.
Screenshot: Twitter username example.
Enter this, if you want to include this social media profile on Job Listing, otherwise left it empty.
- Logo:
Select your company’s logo from your computer by clicking the provided button ‘Choose Image’. This image is used to show the logo of your company profile pages, job listings in a list and individual job listing.
This also helps in indexing in the Google’s search engine.
- After entering details in the above-required fields, hit the button ‘Preview’ which is provided at the bottom of the page.
Screenshot: Job form highlighting the ‘Preview’ button.
- Immediately the page is redirected to a webpage showing a preview of your job listing based on the details you provided on the job form with the 2 buttons ‘Edit Listing’ and ‘Submit Listing’.
- Here, in this preview page, go through the job listings and the details you entered, or have any corrections hit the ‘Edit Listing’ button, otherwise ‘Submit Listing’ button. Immediately the listing will be published and the current page will be redirected to the ‘My Job listings’ page.
Thus, you have posted a job listing successfully.


